Create awesome layouts with Drupal 8 Layout API
Since I've been working with Drupal, Panels and Display Suite have been successfully managing the layout of the website. Drupal 8.5 brought something new to the table - Layout API has been introduced with it.
The layout builder lets users change the way their content is presented. There was some projects in Drupal 7 which were similar to layout builder, but it was never as effective, or as user friendly like the Layout API. The layout, when set up, can affect a content type globally, or user can change layout per node.
There are several places in Drupal where elements can be arranged to control their placement.
Themes have regions, which contain blocks. Content forms have form elements. Content has fields.
The layout builder can be used in two ways. You can use it to create a layout for each content type on your site and you can also use it to create a layout for each individual piece of content.
This second use case makes the layout builder a landing-page-building tool that content editors and marketers can use to create flexible pages within a Drupal site.
It's similar to panels.
Using Layout API:
Layout discovery — core
Layout builder — experimental
Field layout — experimental module — has error with uninstalling — targeting Panelizer module, that is, targets in replacing its complete functionality.
First, you have to install the following modules:
You can use these in different ways.
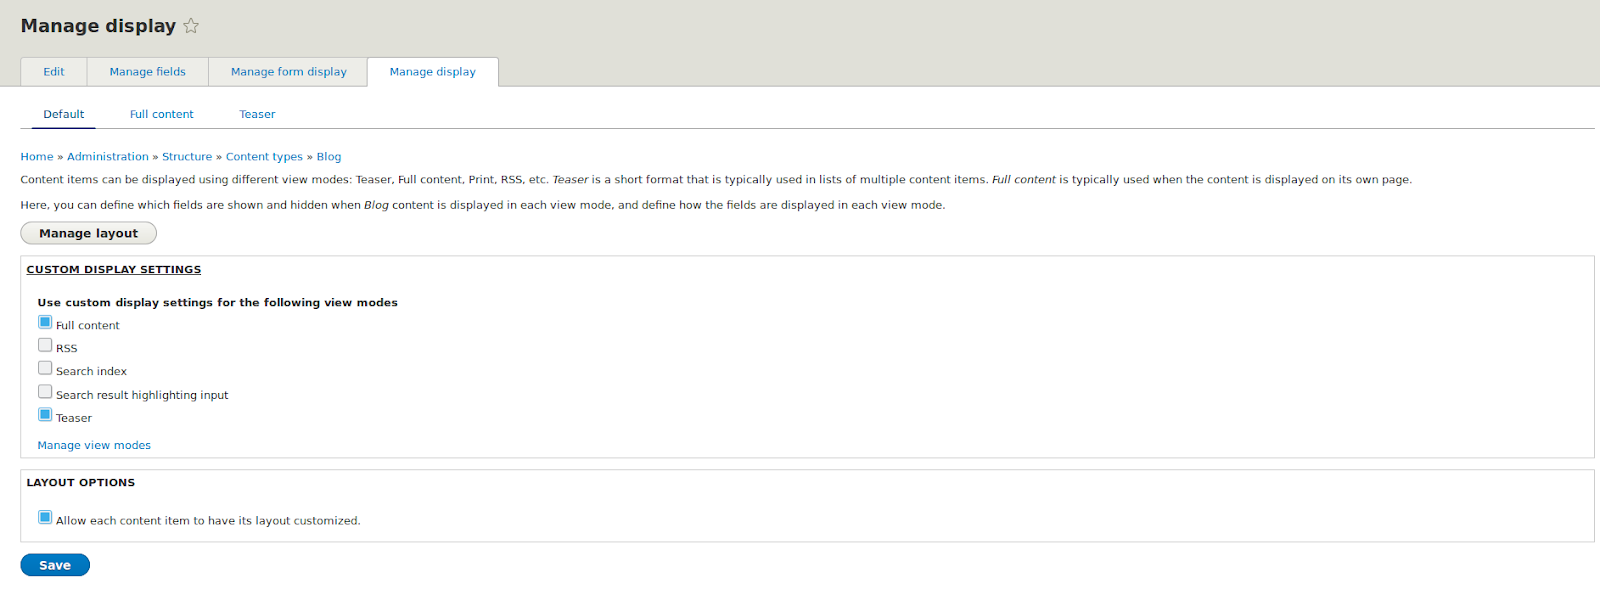
If you go to any content type after enabling the module, and if you go on to manage display, you will see a “manage layout” button. Here, you can manage layout, and besides that, if you check “allow each content item to have its layout customized”, you can then set different layouts on individual nodes of the same content type.
Example:
Create a blog content type, add a field for image, add a text field description, and add body(it should already be there).
Create some content, blog 1 and blog 2 would be enough.
Go to the content type in /admin/structure/types/manage/blog/display and click on manage layout:
This will take you to the layout page:
Sections: Each section can contain content arranged in a certain layout. Example: 2 columns, 3 columns, etc.
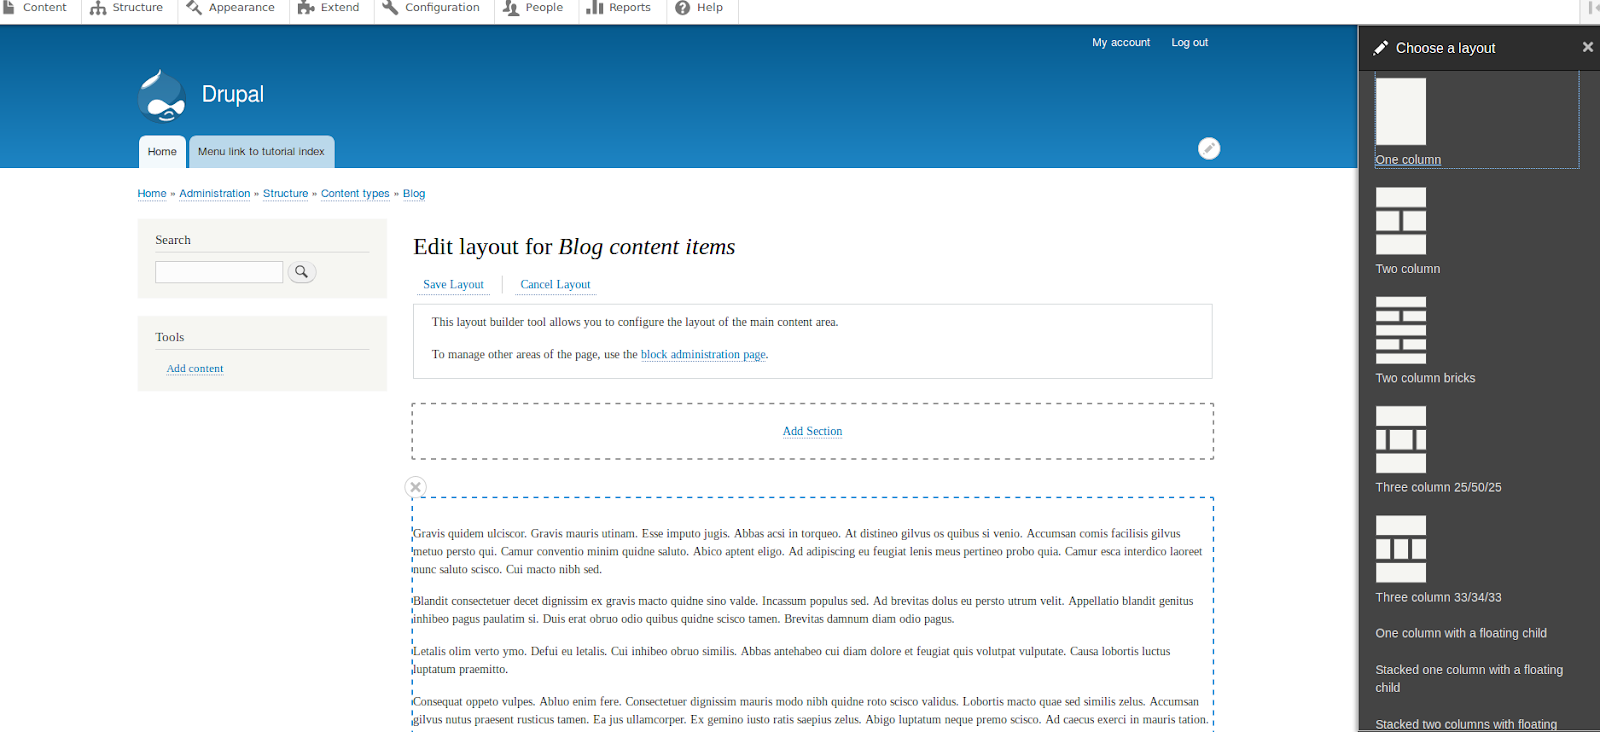
Other layouts (without images) are the custom ones. When you make them, you can add images for better interpretation.
When you choose a type of layout, it will be displayed like this:

Inside each section, you can display:
Fields from the content being displayed. Example: title, body, image, etc. Blocks which appear on the Structure > Block Layout page. Example: Page title, tabs, blocks from the custom block library, etc. For this example we will use the default layouts provided by the module.
Do the following:
1. Choose a two column layout.
2. Set the image in the left column, description in the right column, and leave the body in the bottom block.

That will be the default layout for this content type. Then, if you go to an individual content item, you can see the layout button, where you can customize layout for this particular node.
At the moment, individual different layouts are supported only in default view mode.
We can also change teaser mode layout, and use that content in a view, it will be displayed as we arranged it, but individual nodes in that view can not have individual layouts.
There is a plan for Layout Builder UI, it will be in the 8.6.0-dev.
Custom layouts:
Create a .layouts.yml file in your theme or module. Let’s assume we are making a module called my_layouts for providing more layouts. The file will include the name of the module. In this case, it’d be my_layouts.layouts.yml. This would go on the same directory level as your .module and .info.yml files. Add information for your layout. It’s mandatory to add a machine name, label, category, template reference, and regions in this format.
Example:
In the template file, you can add regions that you create in the .layouts.yml file in the form of twig variables.
advanced_layout_2:
  label: Advanced Layout 2
  category: My Layouts
  template: templates/advanced-layout-2
  library: mci_layout/advanced-layout-library
  regions:
     main:
       label: Main content
     sidebar:
       label: Sidebar
Create a templates directory, where you will have templates for your layout. In my case it’s: advanced-layout-2.html.twig
In the template file, you can add regions that you create in the .layouts.yml file in the form of twig variables.
Example:
<div class="two-column">
    <div class="main-region">
        {{ content.main }}
    </div>
    <div class="sidebar-region">
        {{ content.sidebar }}
    </div>
</div>
If you want to implement custom css or some library, you can make a file named my_layout.libraries.yml which contained this in my example:
advanced-layout-library:
  version: 1.x
  css:
    theme:
      css/advanced-layout-library.css: {}
  js:
    js/advanced-layout-library.js: {}
  dependencies:
    - core/jquery
After that, you create a css and js directory, and in it you can add your css and js files, but the names of those files need to reflect the ones in libraries.yml. For more info on custom layouts and registering layouts you can look at the api documentation:
Layout API documentation on Drupal.org
Using this module, we can arrange layout of blocks, fields, and content. The people from the Cohesion company are making an on screen css editor, which would be a great feature for site builders. Bootstrap layouts — We can use this module to provide layouts.

You can create really cool layouts, go on and try!